The internet is full of “life hacks” – some brilliant and some… questionable. I’ve tried a bunch of them over the years, but recently added these two to my arsenal of things that actually make my life easier.
Simple & Effective Hack #1: Cutting a Mango with a Cup
Mangoes are delicious, but can be a hassle to cut. Before I would struggle with peeling and slicing and end up with wasted mango bits or slices that still had the skin on them. I saw the cup trick a few months ago and it’s a GAME CHANGER!
Here’s how it works:
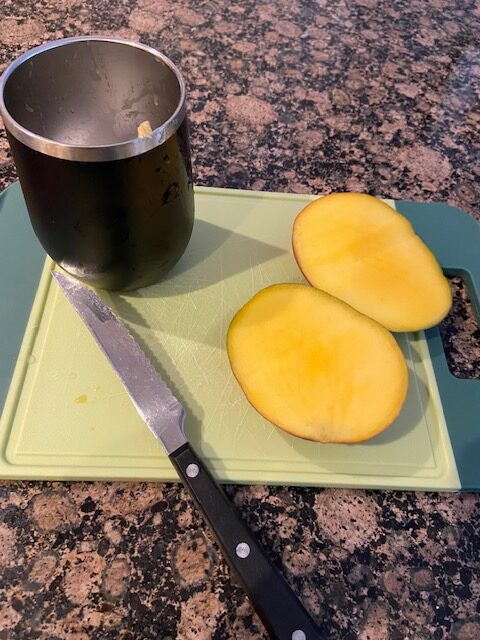
Cut the mango along the sides of the pit like normal, creating 2 halves.
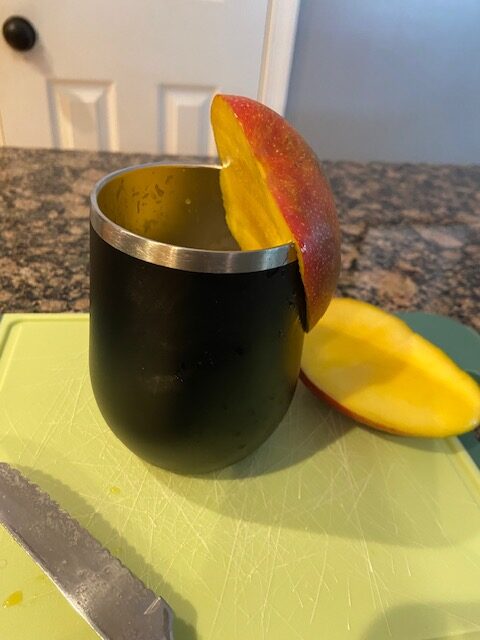
Then, take one mango half and press the edge against the rim of a cup, sliding it down so the skin stays on the outside and the fresh fruit falls into the cup. I’ve found that a metal cup works best, so you don’t have to worry about accidentally breaking a glass with your vigorous squishing.
Repeat with the other half and BOOM that’s it!
Simple & Effective Hack #2: Cut Your Dish Sponge in Half
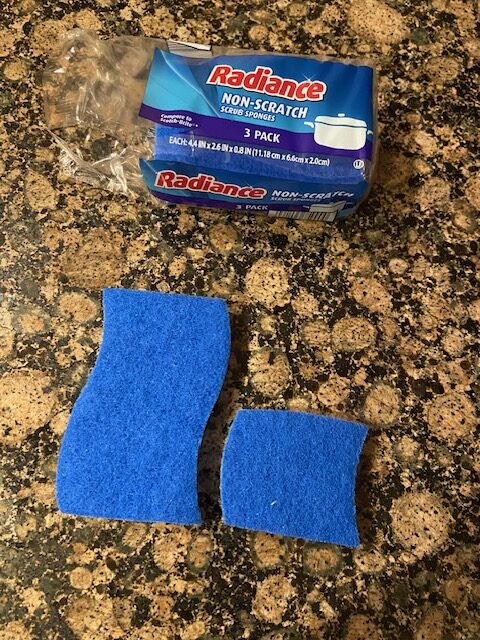
I feel silly even sharing this, but it’s kind of genius and I can’t believe I didn’t think of it sooner. If you use sponge to wash dishes you know how quickly they wear out. Instead of tossing them too soon or using them past their prime, just cut them in half when you open a new sponge.
Rather than being too small, it’s actually the perfect size for scrubbing without being too bulky. You get double the use out of each sponge, which leads to less waste and more savings!
Have you tried these or any other ‘viral’ internet hacks that actually work?
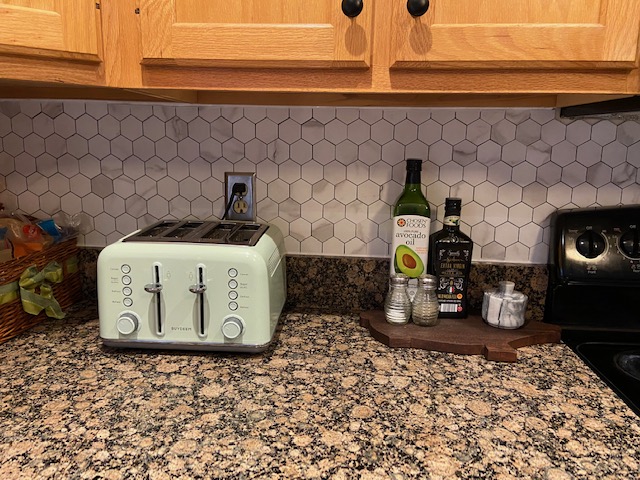
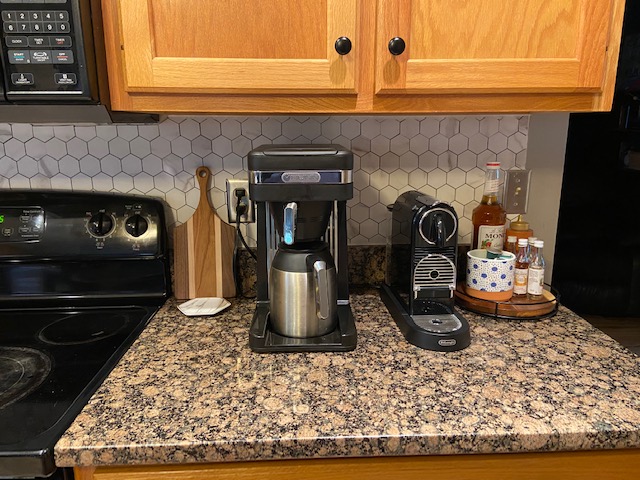
After I did my little coffee bar refresh, I was still feeling bored with my kitchen. It just felt kind of dark and drab… where I wanted it to feel light and clean. When we moved in a decade ago, I had applied a peel-and-stick backsplash… so I decided for fun to rip the whole thing off and put a new one up.
Because that’s my idea of fun.
One of the questions I got on Instagram when I was posting about this project was: did I consider doing REAL tile and grout. And yes, I did consider it. However, I didn’t want to hire out the job and I don’t feel super confident in my tiling/grouting ability. So I decided to do peel-and-stick again, but a much FANCIER version.
So, what did I use?
The KASARO Peel and Stick backsplash in white hexagon (find them on Amazon here). When I purchased the tile, the cost was $29.99 per 6-sheet box. I purchased 6 boxes to make sure I had plenty, since at the time the Amazon link said it was running low. I ended up only using 4 boxes, so I returned 2. I have 5 sheets left, so I barely needed the 4th box… so I have some sitting around in case inspiration strikes.
I had all the tools sitting around (including a fresh pack of razor blades), so this entire project cost me $120 in tile and about $10 for a tube of caulk.
Unlike my last experience with peel-and-stick, this is an aluminum metal composite rather than a rubbery sticker. The tile is much stronger than the previous version, and is more “real” in that it is actual metal tile with a better hand-feel and extremely sticky backing. The difference between this and real tile, is that it sticks right on and no grout is needed. However, get your tile lined up the first time because HOLYMOLY is the adhesive strong!
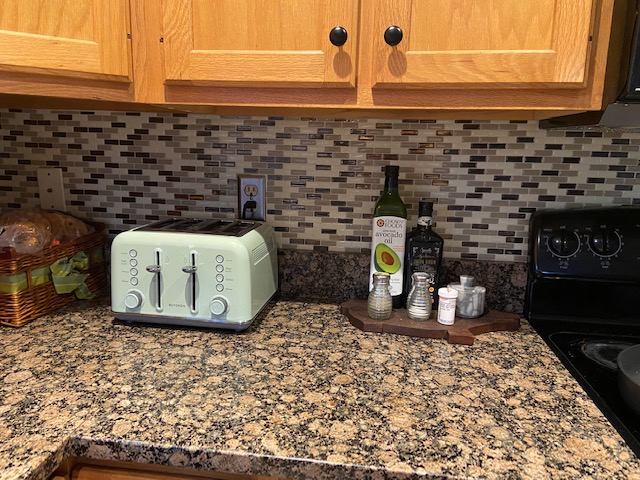
Here is our old backsplash I put up in 2012:
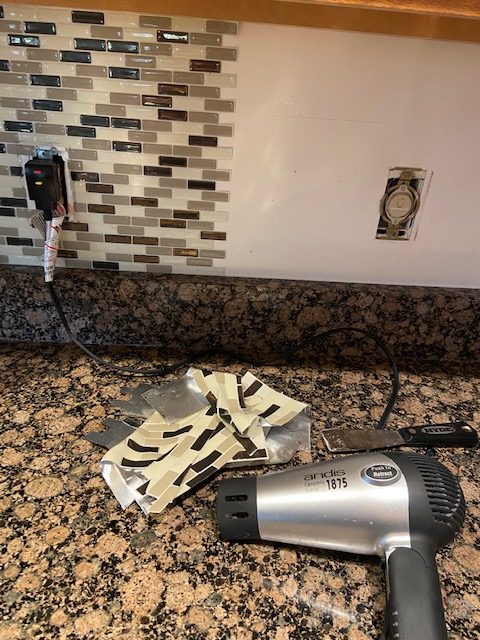
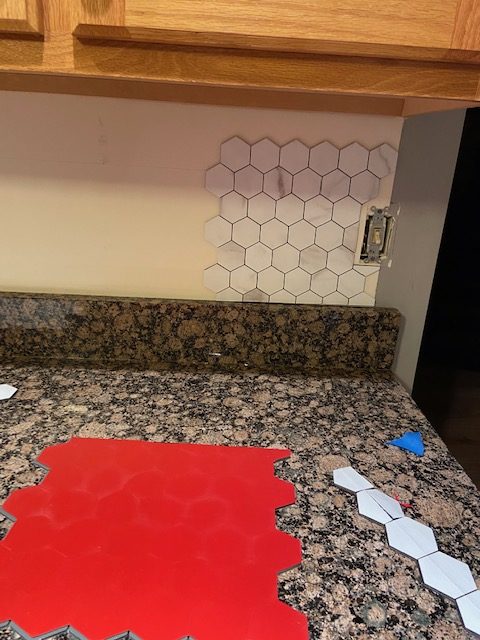
Once I removed the old backsplash (it just took a hairdryer, a spackle knife and some pulling action), I sprayed some degreaser and wiped down the white melamine backing that was left by the previous owners. Once it was dry, I started laying out my tile pieces. Obviously, I wasn’t lucky enough that a sheet exactly fit my spacing, so I measured out cuts for the top and bottoms of my sheets.
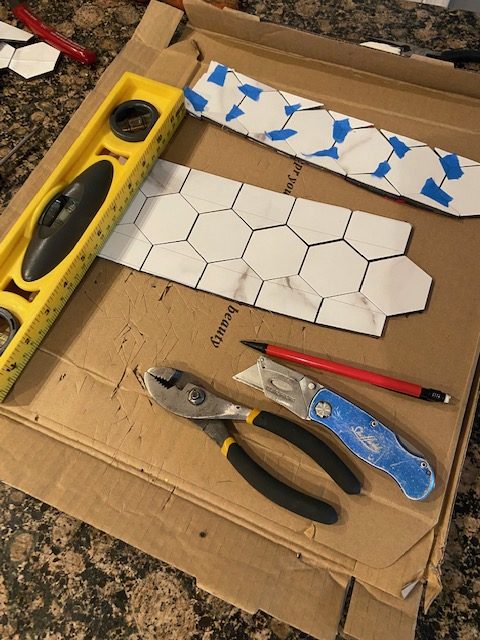
Since the tile is metal, you can’t just cut through it with a pair of scissors. Instead, I used a combination of a level (to measure and as my straight line guide), a fresh razor knife, a pencil and a pair of pliers.
I would mark my exact measurement, go over it 2-3 times with the razor knife, and then clamp on the pliers and snap it on the edge of the table. For every. Single. Hexagon.
My hands were SO TIRED after this project.
Once I had my perfect-sized shape, I’d take off the backing, carefully line it up on my wall, and stick it on. And of course, I’m a perfectionist… so I did the little-bitty points even though only people Jack’s size can see under the upper cabinets.
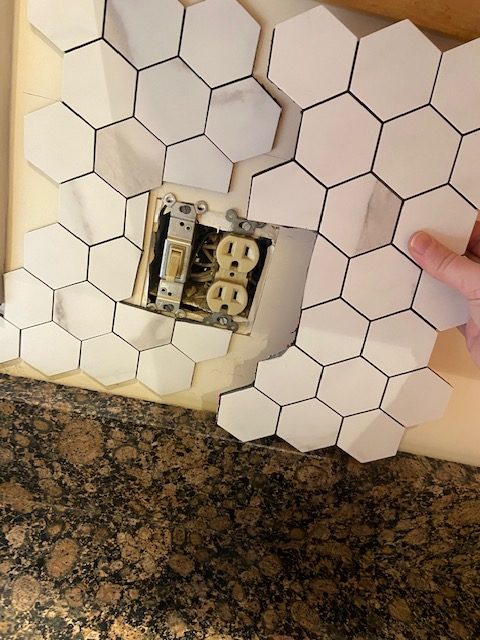
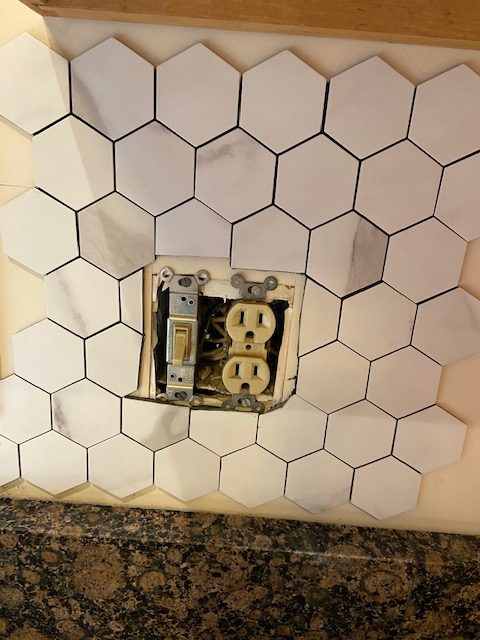
I ended up covering over our old phone line and cable line — I just took the switch plates off and shoved the wires back into the wall. Cutting around the remaining outlets wasn’t difficult, I just held up the pieces of tile and mapped out where I needed to snip a little:
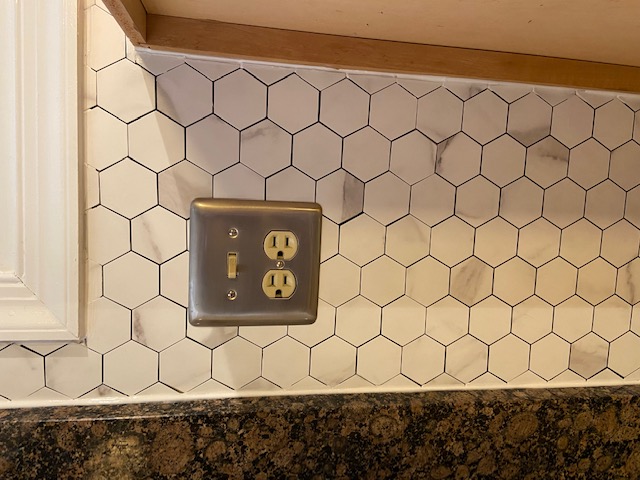
I worked my way around the entire kitchen and when it was all finished, I grabbed a tube of caulk and did a nice line of white silicone around all the edges. This really took the project from ‘looks okay’ to ‘looks professional’… so I highly recommend caulking as a last step!
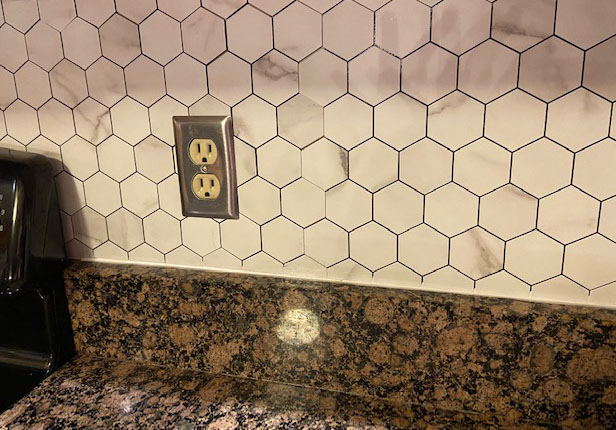
Before caulk:
After caulk:
I wasn’t keeping track of exactly how long the project took me, but thankfully the progress photos I took are time stamped. According to my phone, I spent about 3 ½ hours on Saturday night and then about 8 hours on Sunday. Which means the full project took me about 11 ½ hours.
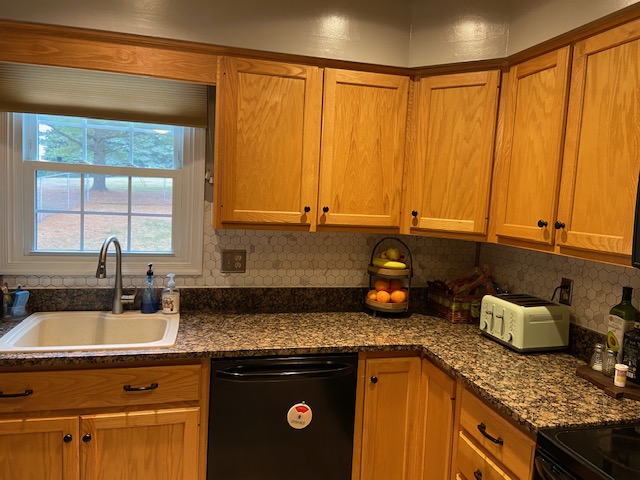
Here’s the “after” for $130 in supplies and 11-ish hours of work:
I am so thrilled with the result!
Disclaimer: This post contains an Amazon affiliate link and ShopStyle affiliate links. This means that clicking on the link may help me earn a small commission at no cost to you
It’s FINALLY the day where I can say our Master Bathroom project is 100% done! Done. There is NOTHING left on the ‘to do’ list other than post a gigantic blog update of the whole project. So, let’s get into it!
And as a warning, this may be the most photo-heavy post I’ve ever done. I’ve included ALL THE PHOTOS. So, you’ve been warned.
Even though I’ve written about this project a bunch of times as we’ve been going through it all (you can click over on my Home Reno & DIY link if you want to read through all the posts), I’m going to give you all a quickie recap.
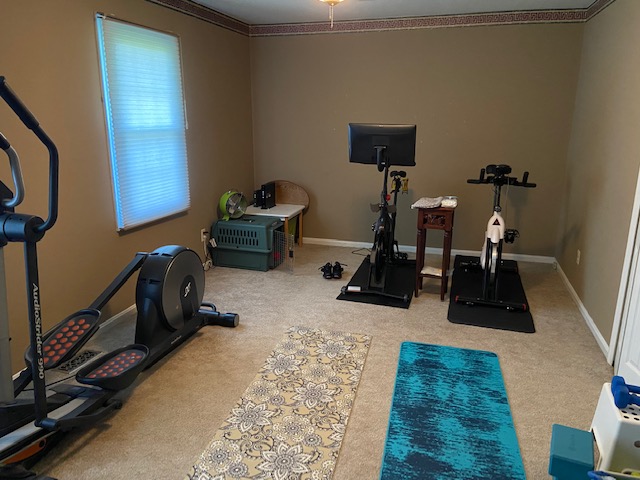
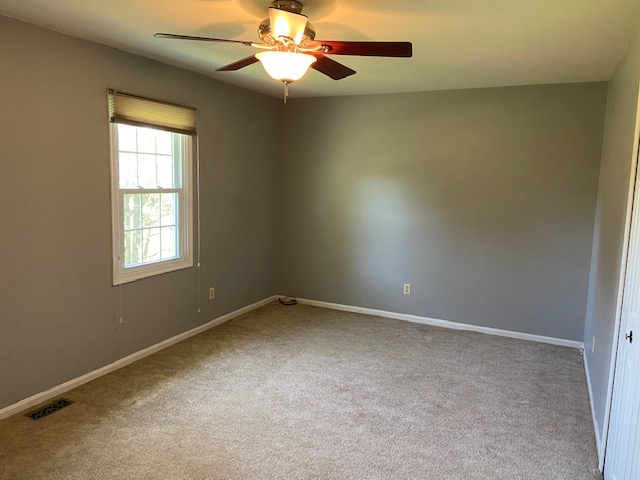
We had an extra bedroom that over the years had served as a playroom and an exercise room, but had the ultimate goal of it one day becoming a Master Bathroom and a Walk-In closet.
However, since it was a regular old room and NOT a bathroom, the project was very involved and snowballed to include pretty much the entire house.
What we wanted:
A new master bathroom
A finished walk-in closet
What we got:
A new master bathroom.
A finished walk-in closet.
New heat ducting running from the basement to the new bathroom.
New plumbing running from the basement to the new bathroom. Resulting in tearing down about half the ceiling in our living room and then putting a new one up so all the pipes and ducts can fit in there.
Our cased opening between the kitchen and living room reducing by 1 foot on one side, for the new heat ducting and plumbing. Resulting in: new drywall, trim, re-painting the kitchen, re-painting the living room and entrance.
Gaining 2 feet in space in our bedroom due to a wall moving. Resulting in us having to re-paint the bedroom and re-carpet the bedroom.
Taking the old ‘master bathroom’ down to the studs and capping off the old plumbing to make a ‘his’ closet for Travis. Resulting in: new drywall, trim, lighting, paint, carpet and closet accessories.
And yes, there’s blog posts every step of the way: my Home Reno & DIY.
We started our project on April 24, 2022 and I put the last bit of silicone in the shower on September 24, 2022. Which means the entire project took us 5 months.
Sure, it could have been done quicker if I had hired it out to a huge team. However, we utilized my dad (he’s a ‘mostly retired’ custom home builder) to do most of the work and he had other responsibilities as well, so he’d come over once or twice a week. We also hired a subcontractor sporadically, a plumber (who was in high demand and took a bit to get to our house) and a tiling guy who was even higher in demand and pushed our project back a month or two. Travis and I did all the demo ourselves, all the clean-up, I repainted everything (basically the entire house), and we assisted everywhere when needed.
Here were my initial thoughts for what I wanted:
Source: Home Depot
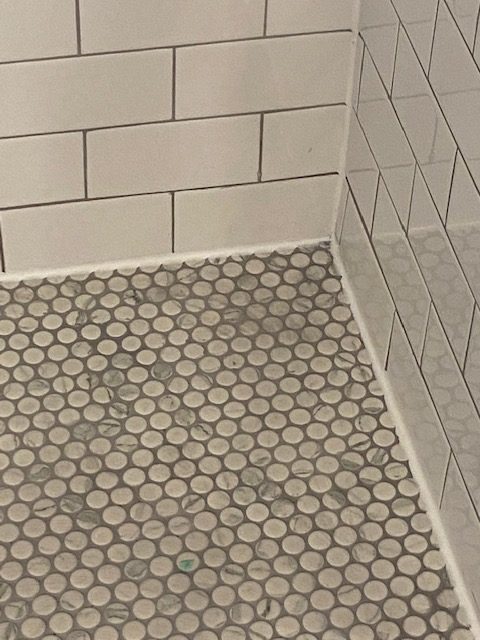
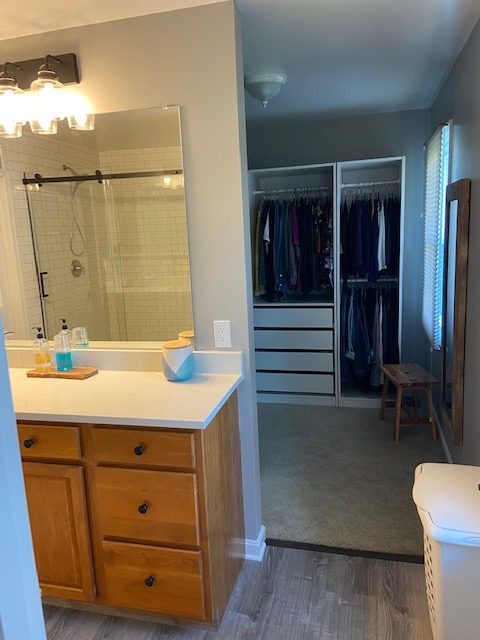
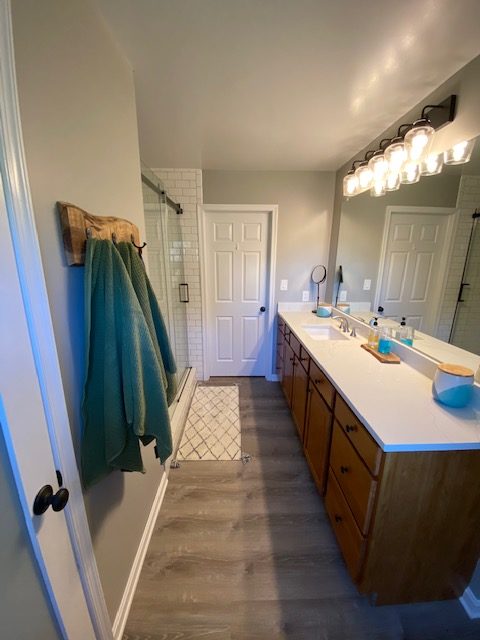
None of these were the actual exact things we were using, as I just grabbed some inspiration images off the Home Depot website to give you an idea what we were going for. We already owned the cabinets (sourced from an old job by my dad), which I was planning to refinish and paint dark blue. I was planning on white subway tile for the shower walls, gray penny tile for the shower floor, a gigantic glass door and a gray plank vinyl floor.
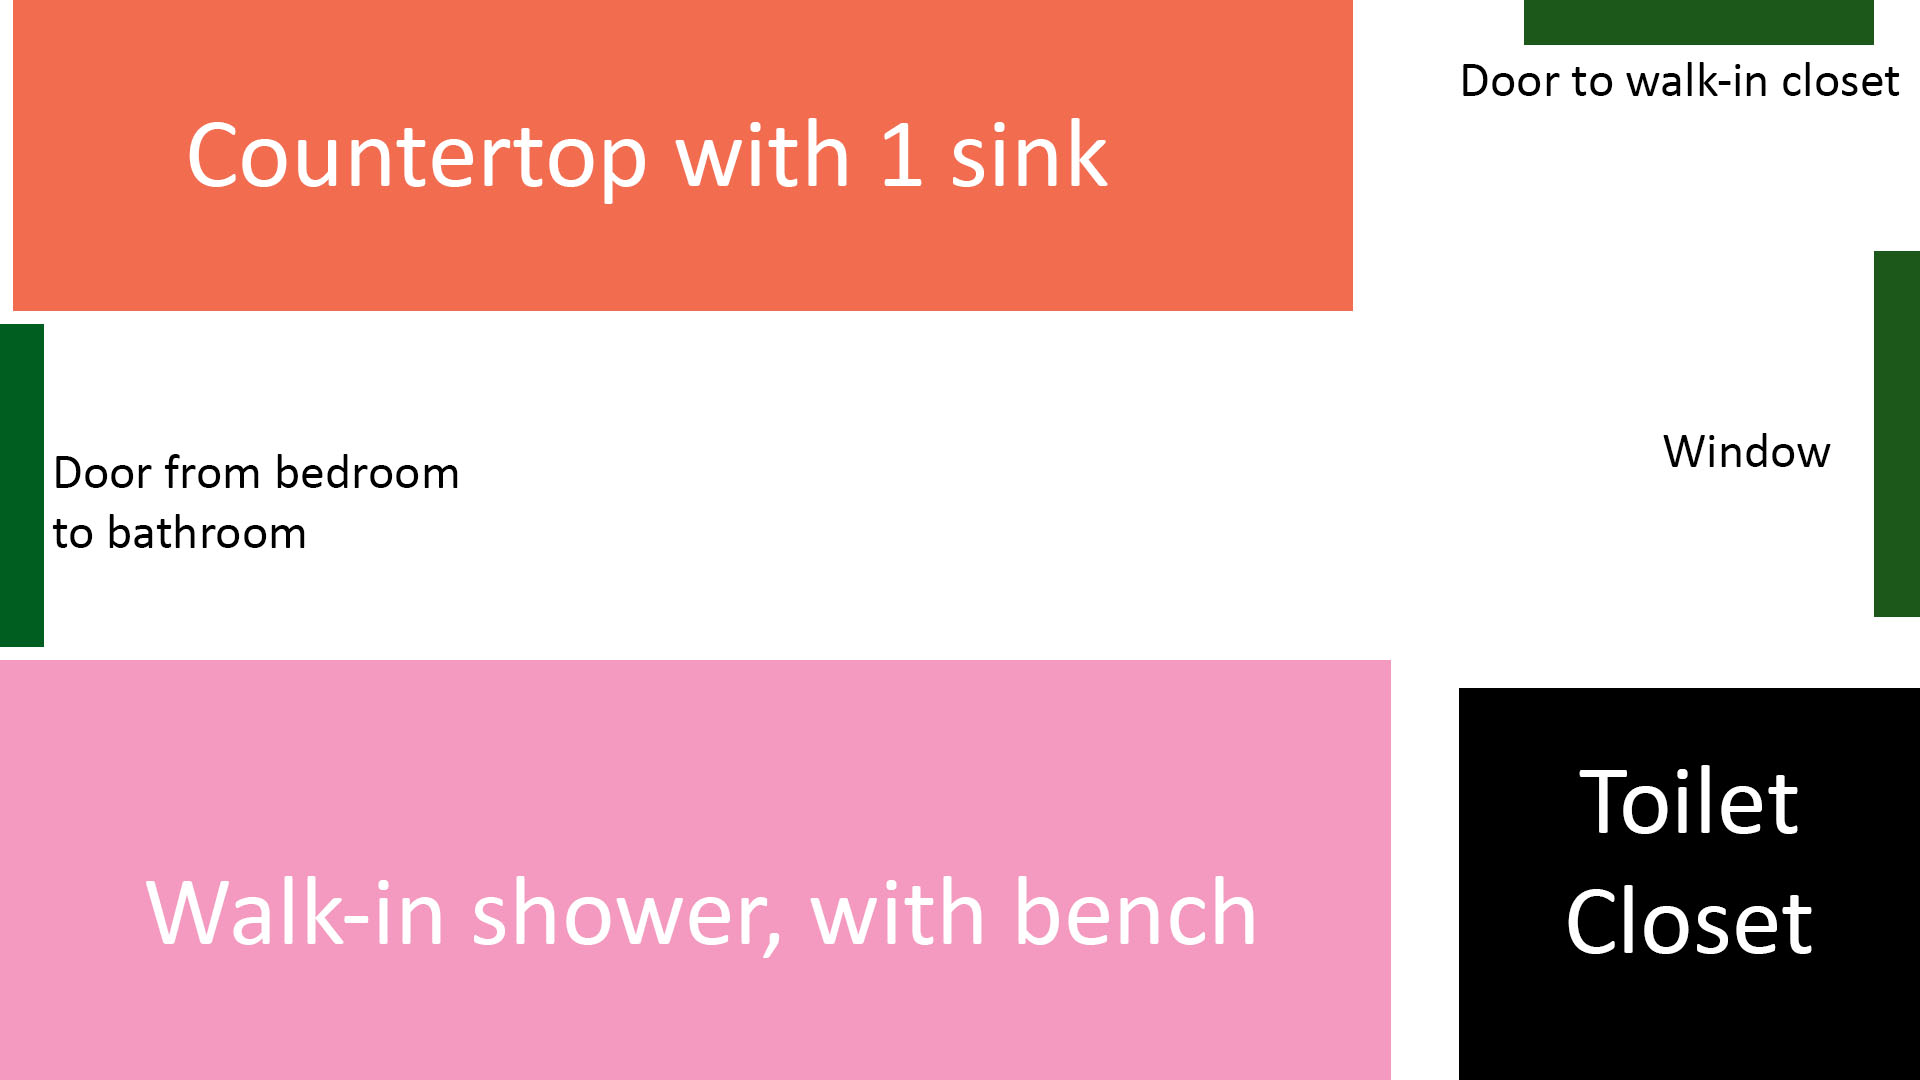
And here was my completely thrown together (not using any actual measurements) plan of where things will go:
So, did it end up like I imagined? VERY, VERY CLOSE!
Before we get into the oooh and aaaaahhh photos of the ‘after’ reveal, let’s first talk about what changed in my plan. Basically, just one thing: the cabinets.
As I mentioned, we were planning to use cabinets sourced from an old job by my dad. They had been living in my basement for 10+ years and to be honest, I wasn’t sure how good of shape they were in, so I figured I’d have to refinish and paint them.
Well, once we set them in place and cleaned them up… they looked fantastic. I did switch out the icky gold knobs with some nice black metal knobs I bought from Home Depot. The wood was still in perfect condition and I figured I’d live with them until we finish the project to make up my mind about painting.
It’s been a few months and I still love them, so no painting is required! However, it’s always an option down the road.
Okay, let’s do it. We’ll do “the before”, “the middle” and “the after”!
The Before
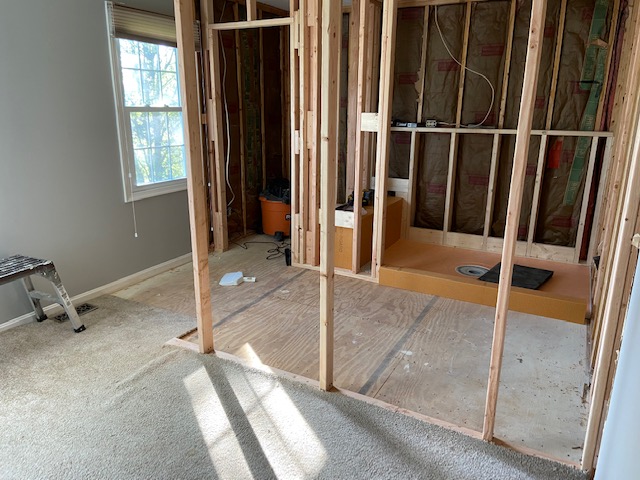
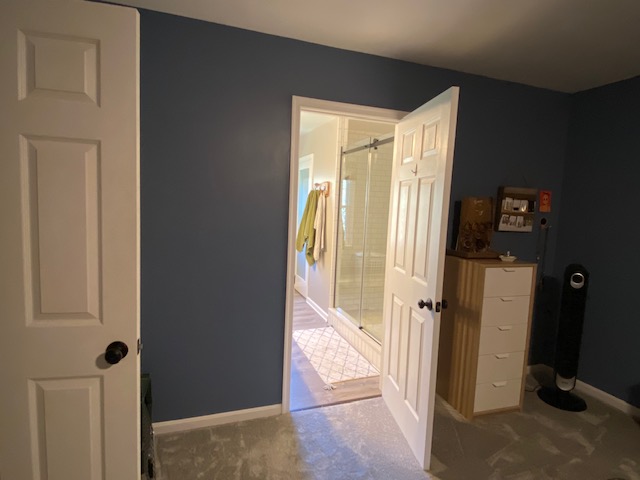
The Middle
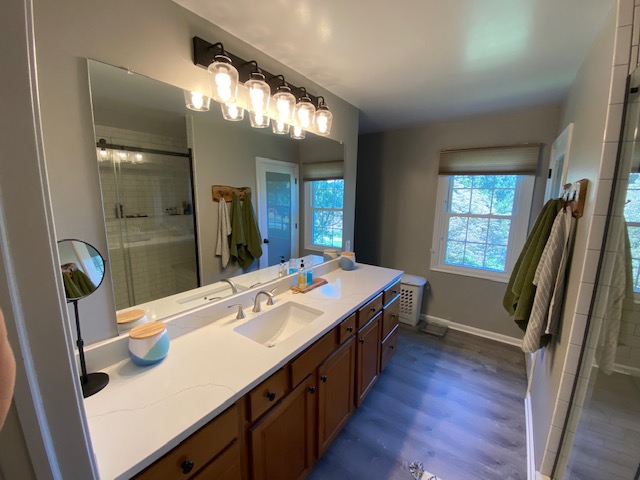
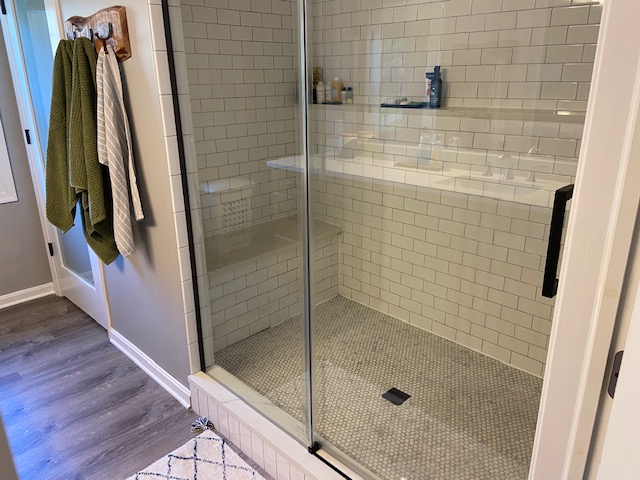
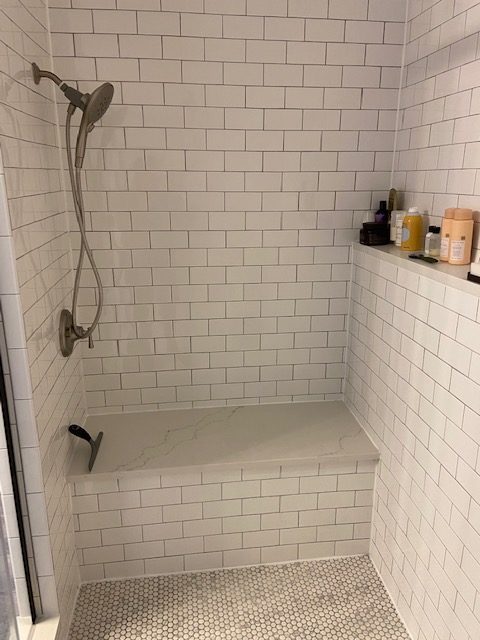
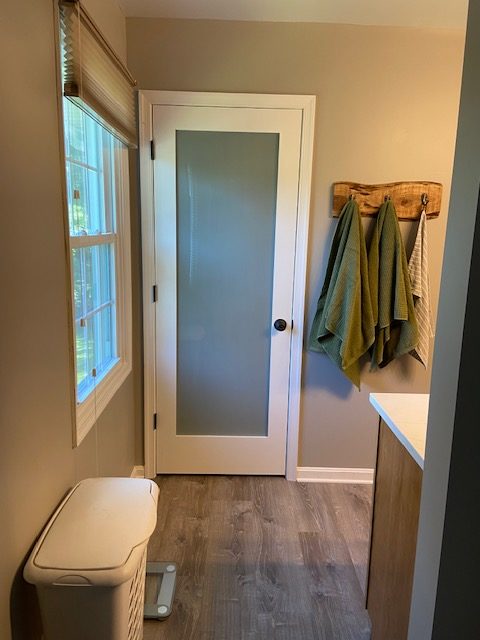
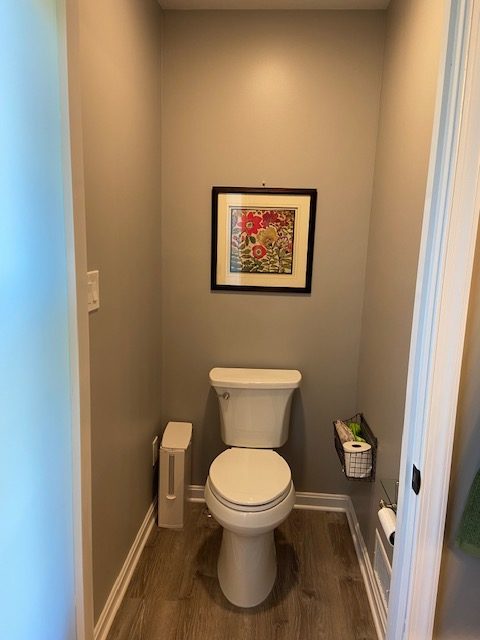
The After
Yes, the shower is gigantic. We are aware. But part of the reason we wanted to design a new space is the fact that my 6’4” husband couldn’t bend over in our previous shower to wash his feet without bumping his head and elbows on the walls. Also, I found out recently that every other mirror in the house only shows him his chest… not his face. So, he may be loving our new bathroom even more than I am!
As it is, we held off on doing the project until we were mentally ready to deal with the house being a mess for months on end. AND until we had saved up enough money to pay for it. It took us 10 years of living in this house to get there, but we are both very, very glad that we finally did it.