Home Update: Old Bathroom to Walk-In Closet

Things have been trucking along, which means it’s time for another Home Update post! This time, as part of our Master Bathroom project, I have an update on what was previously our old master bathroom.

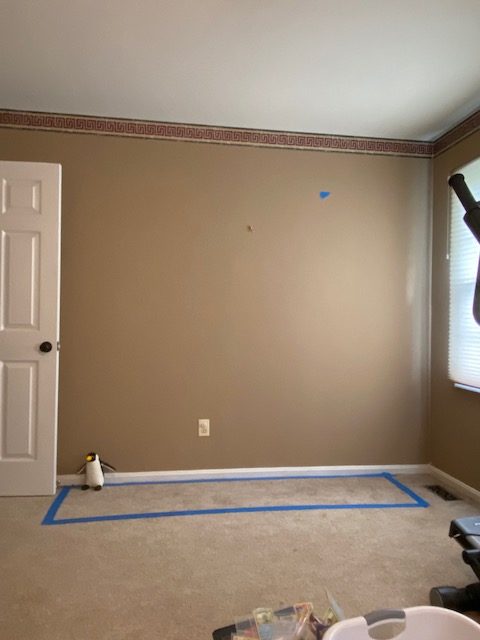
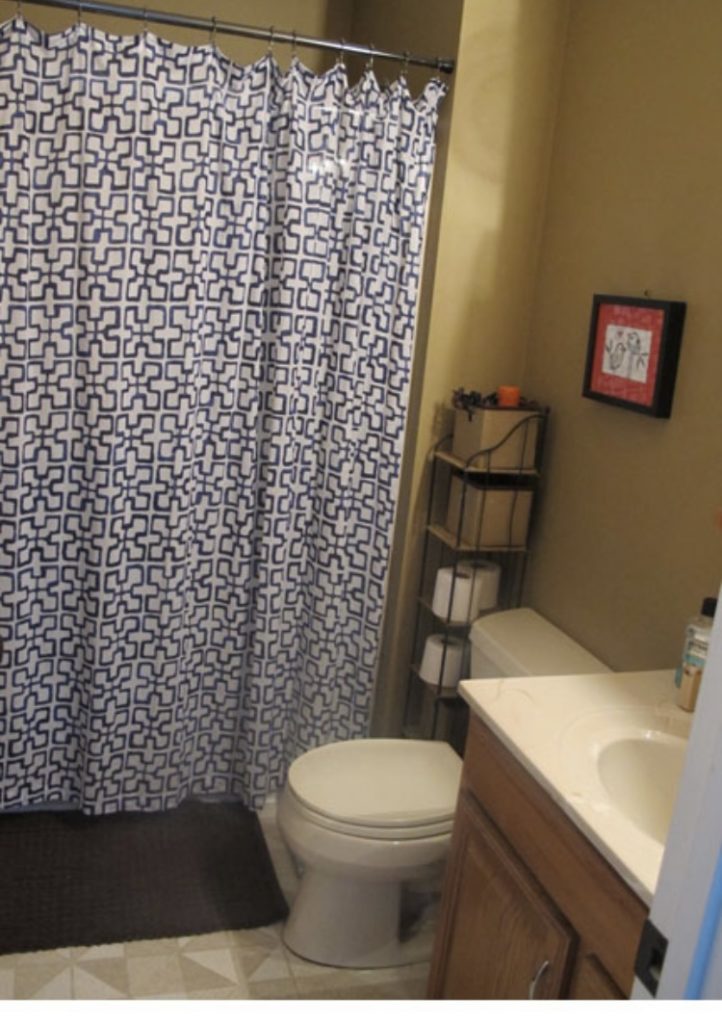
It was a teensy little 3-piece bathroom with a shower, toilet and vanity. This is the best photo I could get by standing partially outside of the door:

We lived with it for 10 years though because renovation projects are expensive. So, for 10 years, I had to be super careful balancing my stuff on the tiny countertop while popping out my contact lenses. And for 10 years, my tall husband banged his head and elbows every time he’d lean down in the shower. Oh and when he would look in the mirror over the sink… it was so short he couldn’t see his face, just his neck.

All those problems are solved with the new master bathroom (post coming very soon), which means we had this extra bathroom just hanging around. My dad tried to convince us to keep it by taking out the shower and putting a door there to go through to the office. However, we already have 2 other full bathrooms on that floor, so I felt that the space could be better utilized.

As you may remember, I built myself a walk-in closet: Home Update: Walk-In Closet, but I wasn’t planning to share. Sorry, not sorry.

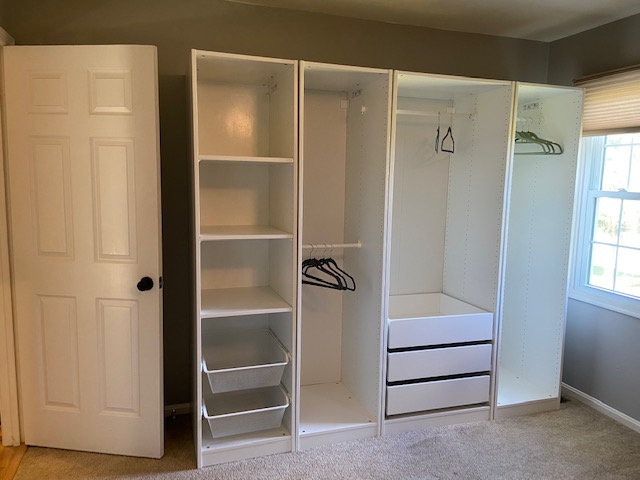
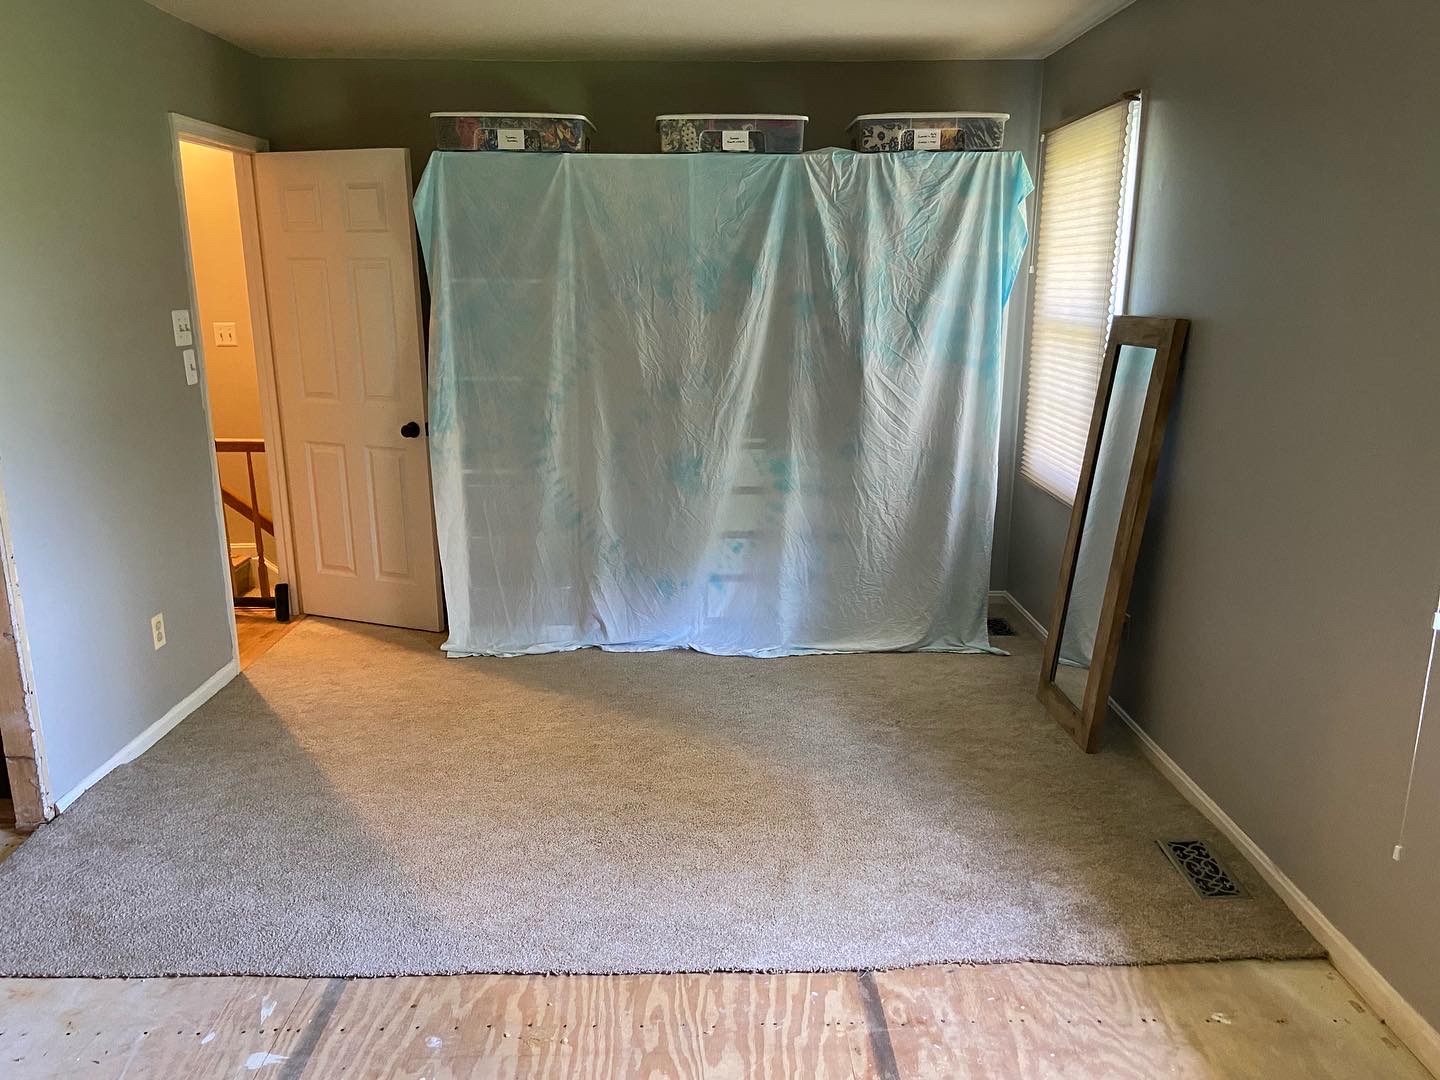
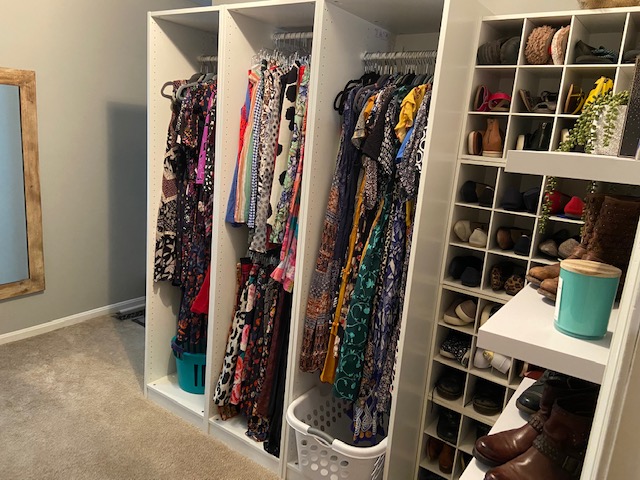
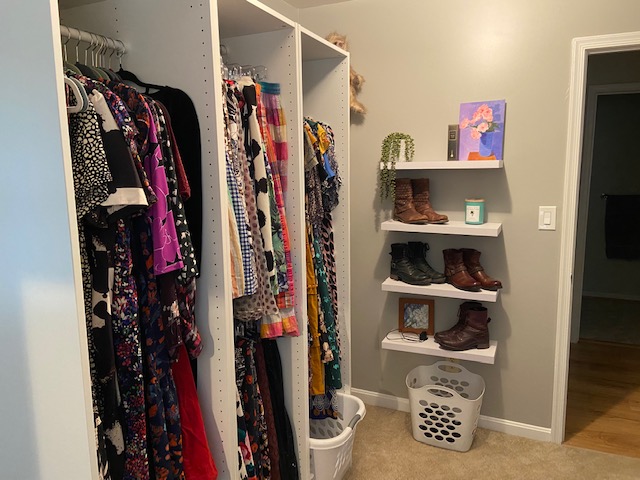
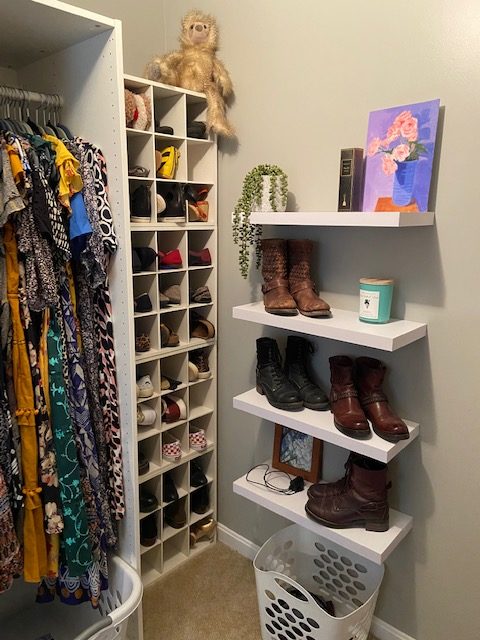
So, I thought it would be a fun idea to turn that little old master bathroom into a walk-in closet for my husband. Which is exactly what we did!

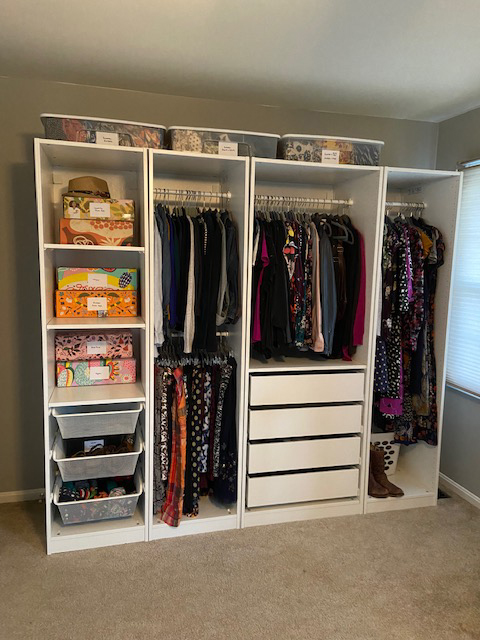
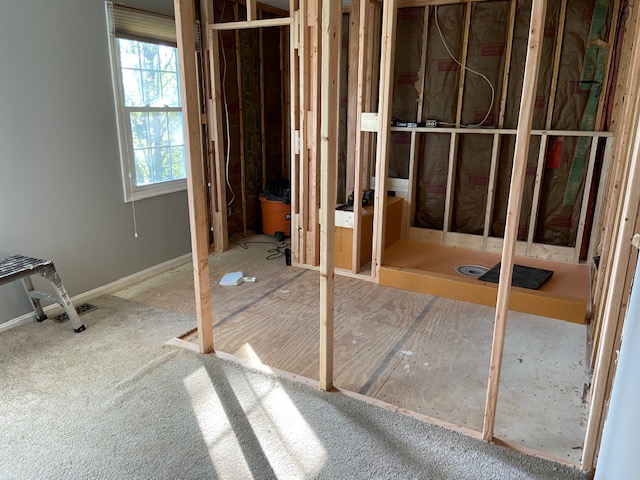
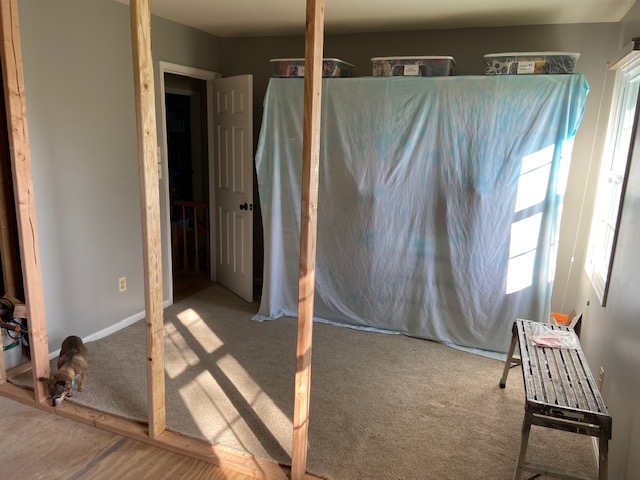
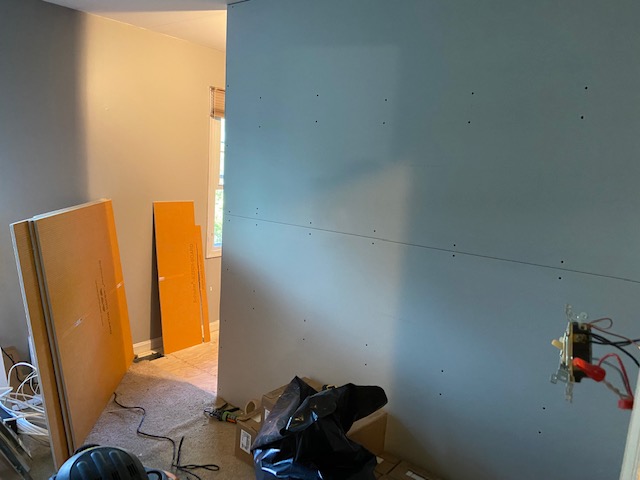
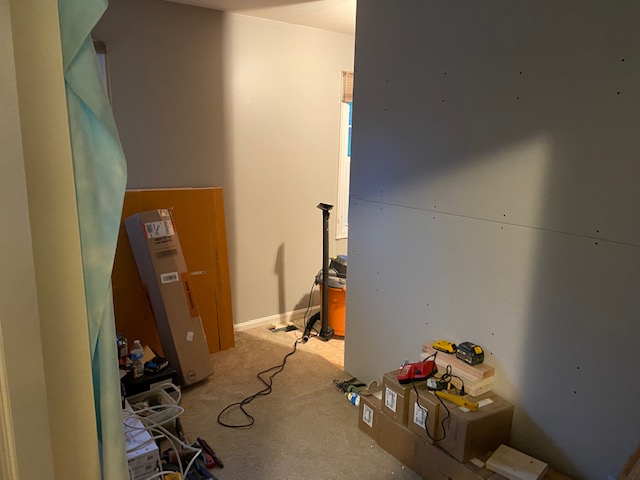
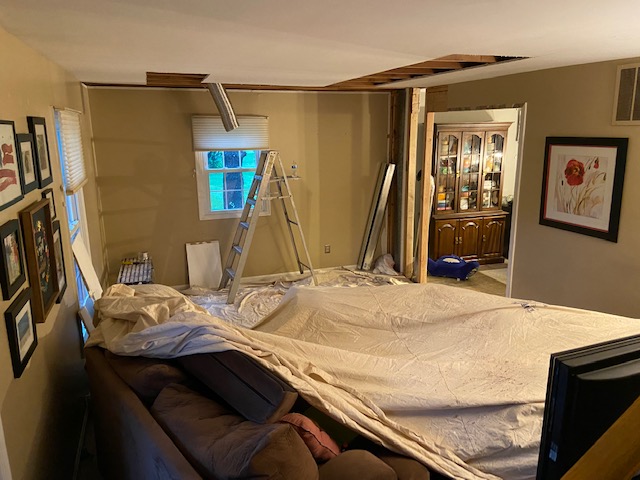
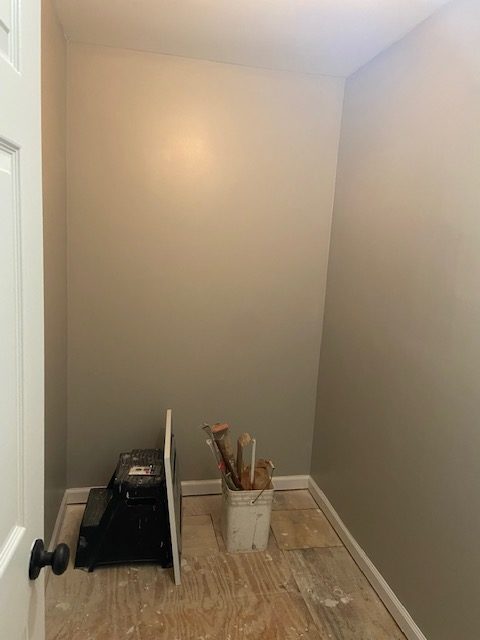
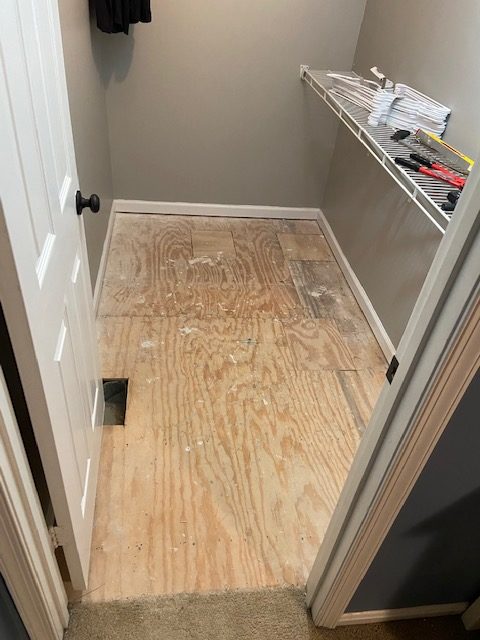
My husband and dad took the old bathroom down to the drywall and then my dad re-drywalled the jankey parts and gave it a few coats of spackle. Once it was all dry, I gave it a light sanding and painted the whole space (Greige again, since I had a full can left over from my last painting project and it’s a wonderful neutral). Then, Travis and I cursed, sweated, and cursed some more installing wire hanging racks (a free hand-me-down from my parent’s old closet). New carpet came last week, the clothes went in… and we’re done!

Well, we’re 99% done. We still have to install the light at the top of the closet (conveniently not included in my photos) and it’s on the schedule for our next free weekend. Besides the light though, we are done, done, done with this project.

It’s a much better use of the space and quite thrilling for my husband to actually have all of his clothes in one spot, rather than spread all around the house. I enjoy it too — not having a treasure hunt through the boxes under the bed, the entrance closet and Jack’s closet when looking for a packed-away polo shirt.

Like what you see? Share me with your friends!

Home Update: Walk-In Closet

Whew, this closet project has been A PROCESS and I’m so thrilled that it is finally done.

Here are all the catch-up posts:

If you don’t feel like clicking through, here is a quick recap: We had a spare bedroom and decided to turn it into a master bathroom and walk-in closet. However, I was impatient and decided to start on the walk-in closet first. I figured that way I can pay for some of the components and start using it early, rather than having to do everything and pay everything at the same time as our master bathroom project.

So we went from here:

To here:

Okay, all caught up!

I lived with my partial closet from December 2021 to May 2022, so about 6 months. Then, we covered the closet area with a sheet and demoed the rest of the room.

Over the next few weeks, walls slowly went back up:

I painted the first weekend in June and then the following weekend I was able to build the rest of the closet. And it is MY DREAM CLOSET!

I did a walk-through video here:

But you prefer photos, here is a look:

Whenever I read these posts online I just want to know… how MUCH did this actually cost? I mean, I’m not a famous influencer so none of this was gifted to me. For someone who wanted to recreate this in their home… let’s break it down.

From Ikea:

From The Container Store:

From Amazon:

If I would have purchased everything all at once, the cost would have been: $1,394.

As it was, I had 2 of the shoe organizers from 2014 (back when they were just $40 each), I spent about $600 on the one side of the closet back in December and then bought the remaining pieces in May. So, it was nice to spread the costs out a bit.

I was still able to get the results I wanted at a lower price by using Ikea rather than doing a full closet with The Container Store, or any of those closet companies that charge you your firstborn. I did a quick mock-up of the Elfa on The Container Store webpage and it was more than double the price for something similar.

I am very, very happy with how it all turned out. Just being able to see all my winter stuff and summer stuff at the same time feels pretty magical. Not to mention that I no longer have items stored under my bed, in my office closet, or packed away in boxes. Everything is accessible and organized, just the way I hoped it would be!

And since we are talking about money, let’s be clear with the items in the closet too. I estimate 80 – 90% of everything in that closet is secondhand (I’m actually thinking it would be fun to count up exactly how many items are secondhand vs store bought… so let me know if that’s a blog post you’d be interested in reading). While some of the items are obviously new to me (as you can see in my monthly thrifting posts), many have been in my wardrobe for 10+ years. As for the shoes, back when Rothy’s were a new thing I was lucky enough to be one of the bloggers who had a lot of readers use my special referral code. So my entire Rothy’s collection was free to me.

Next up, the master bathroom…

Disclaimer: This post contains a ShopStyle affiliate link and an Amazon affiliate link. The Ikea links are not affiliate links. This means that clicking on a link may help me earn a small commission at no cost to you.

Like what you see? Share me with your friends!

Home Update: Living Room

I’m so happy to be able to share another update post with you. Especially because my living room was a disaster for 4 weeks and now it’s back to normal. Actually, it’s not back to normal… it’s better than ever!

As I mentioned in my previous update post, in order to get the plumbing and heat up to the new bathroom, we had to run them from the basement, through the first floor and up to the second floor. This impacted the opening between our living room and kitchen, as well as the living room ceiling.

Part of the ceiling came down on April 24th and then on May 7th, the couch got covered and moved and the room turned into a disaster and stayed that way until June 4th.

Once the plumbing was fully completed, my dad put new drywall up in the ceiling and wall, taped it, spackled it a bunch of times, and then primed everything and painted the ceiling. Over the weekend, I spent six hours in the living room and the connected entrance area edging, rolling, edging again and rolling again.

{Actually, I spent 10 hours painting that day, but the rest of the time was spent upstairs. And yes, my body hurt afterwards}

Once again, I chose Behr Greige for my paint color. I love that it is a nice, clean neutral and it really brightens up the room. I had no idea how dirty and marked our walls were until we moved everything away from them and I started painting!

Once the paint was dry, Travis and I moved back the couch. Then the following morning, I built a new console table and put everything back up on the wall. Most of the same pictures went up, except for the area over the bookcase.  I used the opportunity of filling holes and painting to put up new stuff on the wall and I love how it turned out.

If you’d like to see a fun Before/After Reel I did on Instagram, you can find it here:

And here are my After photos:

The pictures stayed the same on this wall (below), but I switched out an old black fake fireplace/space heater thing with this pretty console table. It gives us better storage options for Jack’s video games and chargers and also sticks out less from the wall so it doesn’t block foot traffic.

And here is the updated area (below). We’ve had the organizer since Jack was a baby and it now houses a mix of toys and games. I picked up the two hand drawn pictures at a consignment shop, thrifted the sculpture, found the drawer at an antique shop and the mirror was a clearance find at T.J. Maxx.

And I let Jack decide how to fill the drawer slots.

LOOK! He made mini Lego figures of our family! And of course Travis and I both have gigantic cups of coffee:

Having our living room back together feels fantastic. I’d been holding off on repainting for awhile since it was going to be such a pain to move everything, so I’m so happy that the huge job is done and everything looks so nice and clean again.

Next up, the walk-in closet!

Like what you see? Share me with your friends!