
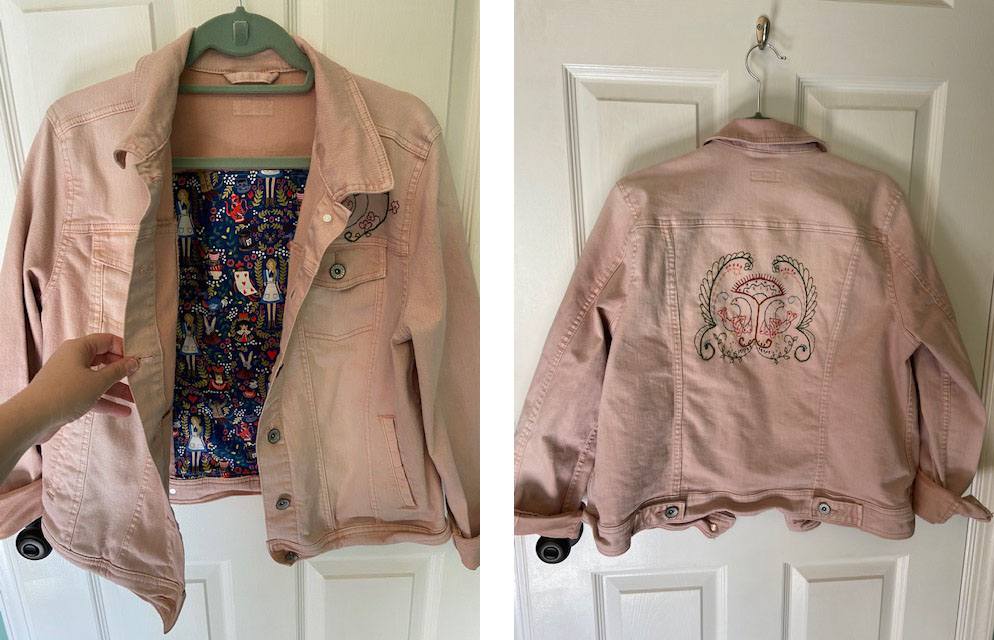
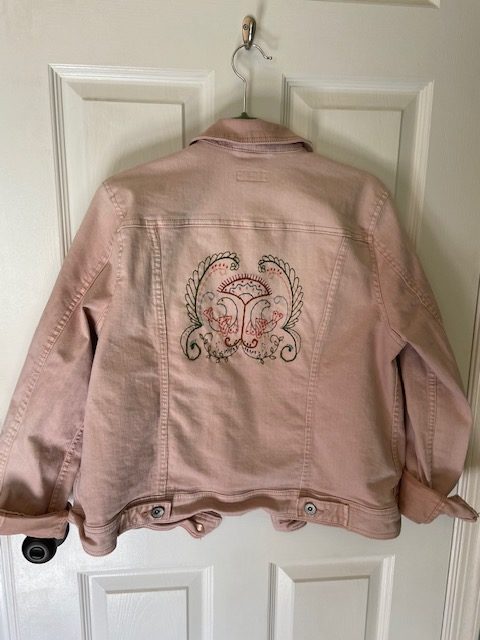
In last week’s Thrift Haul post, I shared the washed pink jean jacket that I thrifted for $12. While I’m typically not a pink kinda girl, I thought the muted clay color was really interesting and that it could be a fun backdrop for a little DIY project.
My initial thoughts were that I’d try some embroidery, similar to Johnny Was pieces… but without the $300 price tag. I also thought I’d try adding in a super fun fabric as lining to cover up the ‘wrong side’ of the embroidery that would have been visible.
I popped over to Joann Fabrics to see if they had any fun embroidery options and found a few Stitcher’s Revolution Iron-On Transfer Patterns that were close to what I was looking for. I purchased a few to try out, but ended up using this one for this project: https://amzn.to/31zFgpP
I started with the back and ironed on one of the larger designs.
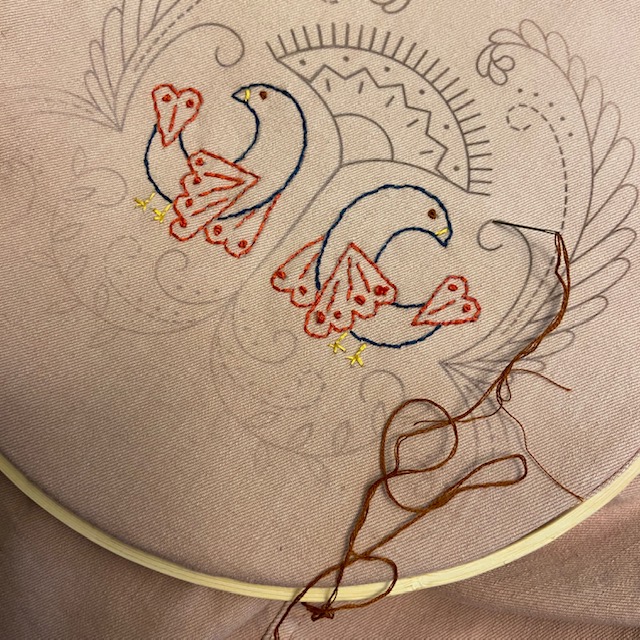
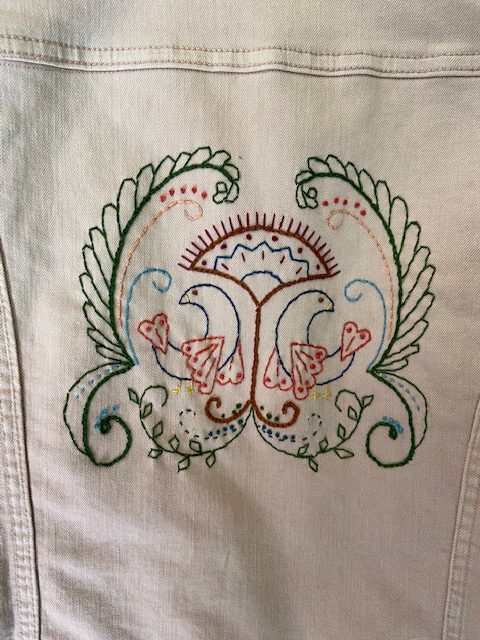
I had never done embroidery before, only cross-stitch, so I watched a couple YouTube tutorials to teach myself the backstitch, French knot and chain stitch. I had a bunch of embroidery floss on hand from other projects, so I just picked each color as I went and ended free-handing part of the design for funsies.
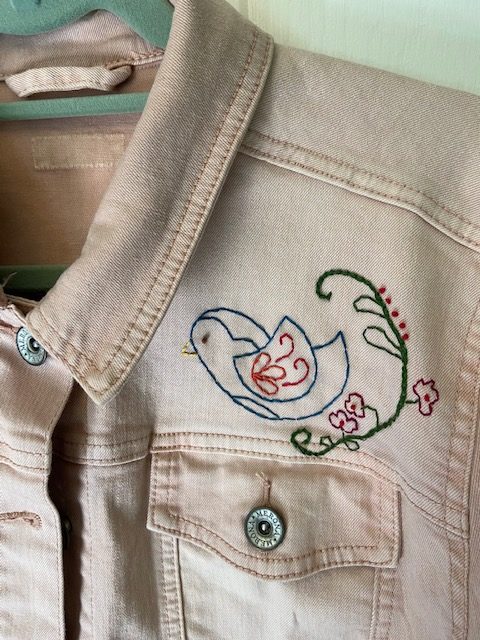
After I finished the back, I decided to add a little bird to the front as well… so I sliced and diced an existing bird into what I was looking for and ironed the guide on. This one went much quicker, since it was smaller.
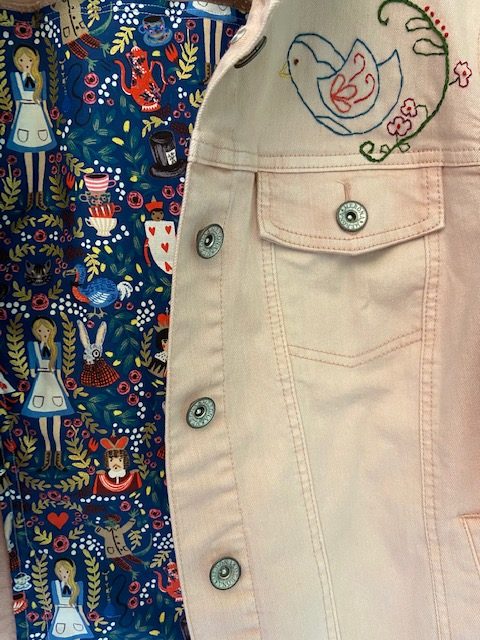
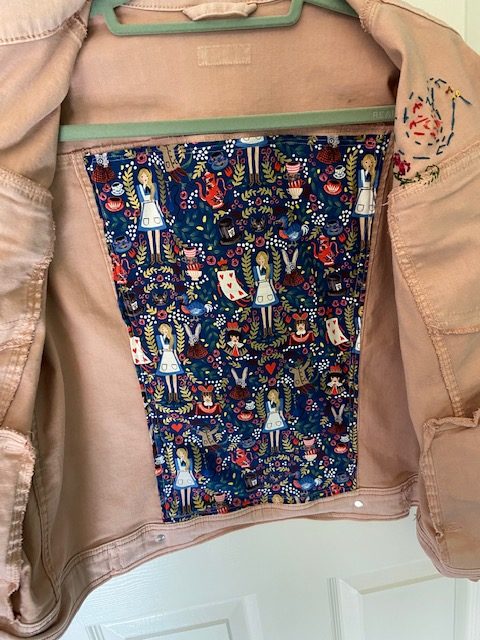
Once I finished the front bird, I then thought I’d sew in a lining. However, I didn’t get too crazy with lining sewing, since I’m not a very experienced sewist. I basically cut the lining to the shape of the middle back placket, folded and ironed each raw side down, and then sewed it along the seams. It was relatively easy and turned out great. Not only does the Rifle Paper Co Wonderland fabric cover the ugly side of my embroidery… it’s is also fun pop of pattern when I take the coat off!


All in all, I’m pretty excited that this project basically jumped out of my imagination into real life!
Disclaimer: This post contains an Amazon affiliate link. This means that clicking on a link may help me earn a small commission at no cost to you.
How did you attach the Wonderland fabric cover without the stitches showing on the outside? Thank you.
Hi Elaine – I used light pink thread on the bottom and made sure to keep the sewing line right next to the seam on the jacket. It just blended right in!